
How to fix WordPress not Sending Emails Issue
WordPress not sending email? or Having issues sending and getting an email from WordPress? Well, most of us are facing the WordPress email error issue. This is a typical issue among numerous WordPress Users. Everyone wants to know How to fix WordPress not Sending Emails Issue.
But there is no need to worry, there are many simple solutions to fix this issue.
In this article, we will clarify why WordPress not sending an email or the most common WordPress email error and we’re likewise going to demonstrate to you a quick and simple solution.
WordPress Email Error
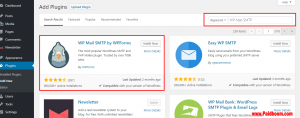
Install the Gmail SMTP Plugin

To fix this issue, you can install a Gmail SMTP Plugin.
Utilizing a free Gmail account, take note of that you would have a day by day limit of 500 emails (which gives you 15,000 emails for every month). This ought to be alright for most regular users.
In any case, if you need more emails then you can increase your email allowance to 2000 per day agreeing to accept a paid Google Apps for Work account.
After the completion of the installation process. click Activate.
You will see the page of Plugins with a message on the top that shows your plugin is activated. Stay on the same page and search the Gmail SMTP Plugin and click on Settings.
Authorize the SMTP plugin

Now, you have to approve your SMTP plugin to send emails or messages utilizing your Gmail account. For this to work, you need to make a google web application and produce API keys.
This process is technical but it is quite simple and direct. Go to the Google App creation page, and sign in with the google account you need to utilize.
Then go to the “Register your application” page and select the ‘yes’ option and click on the Agree and Continue.
Click on “Go to credentials” on the next page.
On the same page of “Add Credentials” leave the API set to “Gmail API”, select the web browser where you want to place the API and select “User data” as the sort of information you would get to. Next, click What credentials do I require?
- In the following page, enter a name for your authorization customer and enter your blog URL in the “Authorized Javascript origins” input box. Your “Approved Redirect URI” is given in your Gmail SMTP plugin page. Go there and copy it. Ensure that you copy the entire link.
- Paste the following redirect URI in your Gmail credential page, after that click on Create Client ID.
- In the next step, leave the email address set to the one you need to utilize and enter an item name. You can utilize any item name you pick, e.g. “Gmail SMTP Sender”. Next, click Continue.
- In the last and final step, click done.
- In the next step, you will reach the credential page. Tap on the name of the credential you just made.
- After that step, you can view your Client ID and Client Secret. In the next step, copy the client ID and client secret into the given input boxes in the Gmail SMTP Plugin on setting page.
- Then enter the address of your Gmail that you are using in the “OAuth Email Address” and “From Email Address” spaces. After that enter that name that you want to show when an individual receives your message.
- Select TLS option in “Type of Encryption” and in SMTP port enter 587 then click save changes.
- When you click on the “save changes” button then a “Grant Permission” would appear below the save changes button, click on it.
- Click on Advanced if you view the warning notification that your app has not been verified after that just go to the URL(link) then finally click on the “Allow” button.
- After some time, you will see a notification of “Access Granted Successfully” on the top and make sure that the SMTP Status should be connected.
- All steps are done, now you have configured WordPress to send emails by using this effective plugin.
Testing your Gmail SMTP Plugin

Now, it is important to check the testing of mails whether it is working or not.
To do this, click on the Test email, fill the box of subject and message then click on send an email.
If you follow this procedure of installing, authorizing and testing the plugin correctly then you will receive the test email which means your WordPress not sending emails issue is resolved.


